Professional water damage restoration follows a systematic, multi-phase process from emergency response through full reconstruction. Each phase builds on the one before it — stopping damage from spreading, removing water, drying structural materials, eliminating contamination risks, preventing mold, and restoring your property to its pre-loss condition.
If you're currently dealing with water damage, call (888) 609-8907 now. The process outlined below works best when it starts early — every hour of delay gives water more time to migrate into wall cavities, subfloors, and insulation where it becomes exponentially harder to address.
Here's the complete breakdown of what professional water damage restoration actually involves, what equipment is used at each stage, how long each phase takes, and what you should expect as a homeowner.
Step 1: Emergency Contact and Initial Response
The restoration process begins the moment you make the call. Professional restoration companies operate on emergency timelines because water damage is fundamentally time-sensitive — mold can begin growing within 24 to 48 hours of water exposure, and the water damage category can escalate from clean water to contaminated water within that same window.
When you contact a restoration company, a coordinator gathers critical information: the source of the water, how long it has been present, the approximate area affected, and whether anyone in the household has health concerns that affect urgency. This conversation determines how quickly a crew is dispatched and what equipment they bring.
For emergency situations — active flooding, sewage backups, or water events involving electrical hazards — response times are typically measured in hours. Most professional companies offer 24/7 emergency response with extraction equipment already loaded on their vehicles.
While waiting for the team, stop the water source if you can safely do so, cut electricity to affected areas if water has reached outlets or appliances, start documenting with photos and video, and move valuables off wet surfaces. For a detailed breakdown, see our guide on what to do in the first 24 hours after water damage.
Timeline: Emergency dispatch typically happens within 1 to 4 hours of the initial call.
Step 2: Inspection and Damage Assessment
When the restoration team arrives, the first on-site activity is a thorough inspection — because effective restoration requires understanding the full scope of the problem before beginning any work.
The team conducts a systematic evaluation of the affected area and all adjacent spaces. This includes visual inspection of every room where water may have traveled, including rooms on the other side of affected walls and the floor below. Moisture meters — both pin-type and pinless — check materials that look dry but may hold moisture internally. Infrared thermal imaging cameras detect temperature differences in walls, ceilings, and floors that indicate hidden moisture. The water source is classified according to IICRC S500 standards as Category 1 (clean), Category 2 (gray), or Category 3 (black), which determines the entire protocol moving forward.
The assessment team may move furniture, pull back carpet edges, remove baseboards, and open cabinet doors to check for hidden moisture. Everything is documented with photos, moisture readings, and written notes — this documentation serves as the baseline for the entire restoration and is critical for insurance claims.
After the assessment, you'll receive a scope of work outlining what needs to happen, which areas are affected, what materials can likely be saved versus removed, and an estimated timeline.
Timeline: A thorough inspection typically takes 1 to 3 hours depending on property size and the extent of water migration.
Step 3: Water Extraction
With the assessment complete, the physical work begins with water extraction — removing standing water and as much absorbed water as possible from every affected surface.
Extraction is the most immediately impactful step in the entire process. Professional extraction removes the vast majority of water — typically 90% or more — in a fraction of the time that drying alone would require. Every gallon removed is a gallon that doesn't need to evaporate through the slower structural drying process.
The crew starts with standing water in the most heavily affected areas, then works outward to saturated carpet, padding, and flooring. Carpet is pulled back from tack strips to access and extract water from the padding and subfloor beneath. In Category 3 (black water) situations, contaminated carpet padding is removed entirely — it cannot be decontaminated. For water inside wall cavities, technicians may drill small holes near the base of the wall to allow drainage and provide access points for drying equipment later.
Equipment: Truck-mounted extractors powered by the restoration vehicle's engine extract hundreds of gallons per hour. Portable extractors handle areas the truck-mounted hoses can't reach. Weighted extraction tools are pressed into carpet and padding to force water into the vacuum stream. Submersible pumps handle significant flooding where water depth makes other tools impractical.
What to expect: Extraction is loud and disruptive. Hoses run from the truck through your property. Furniture is moved or elevated. Carpet is pulled back. But it's also the phase where the most visible progress happens — standing water disappears quickly once commercial equipment is running.
Timeline: Extraction for a typical residential loss (one to three rooms) takes 2 to 6 hours. Large-scale flooding may require a full day or longer.
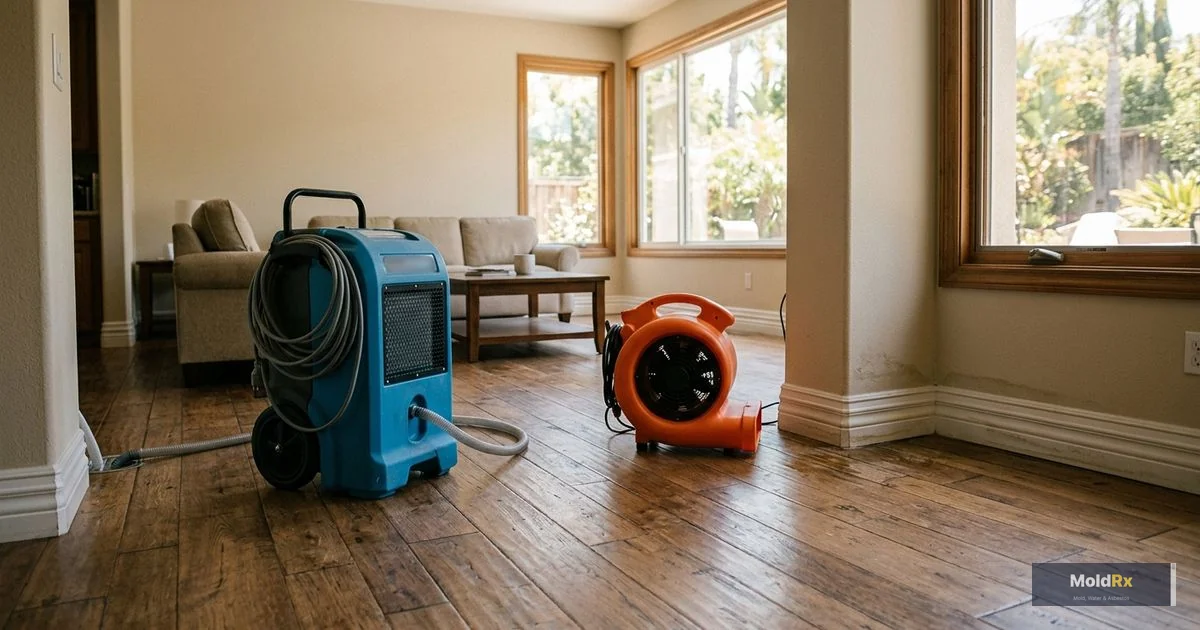
Step 4: Drying and Dehumidification
This is the longest and most technically critical phase. Extraction removes standing and surface water, but enormous amounts of moisture remain absorbed in drywall, wood framing, subfloor materials, and concrete. All of that moisture needs to come out thoroughly before the property can be restored.
Professional structural drying uses high-velocity air movement and industrial dehumidification to accelerate evaporation while removing moisture from the air before it reabsorbs elsewhere. The crew positions equipment strategically based on the moisture map from the assessment. Air movers direct airflow across wet surfaces — walls, floors, inside cavities. Industrial dehumidifiers pull moisture from the air, preventing it from migrating to dry materials in adjacent areas.
Technicians return daily — sometimes twice daily early on — to take moisture readings across all affected areas. Readings are logged and compared against the initial baseline. Equipment is repositioned as drying progresses, moving from areas that have reached target levels to areas drying more slowly.
The drying standard isn't "feels dry to the touch." It's verified dry — moisture meter readings confirm that affected materials have returned to levels consistent with unaffected materials in the same structure. Materials can feel dry on the surface while holding dangerous moisture internally, and that hidden moisture is exactly what leads to mold growth behind walls weeks later.
Equipment: High-velocity air movers (typically 1 per 10 to 16 linear feet of wall), low-grain refrigerant (LGR) dehumidifiers removing 15 to 30+ gallons from the air daily, desiccant dehumidifiers for hardwood floors and low-temperature situations, Injectidry systems that force dry air into wall cavities and under cabinets, and moisture meters with data loggers for tracking progress.
What to expect: Your home will be noisy — equipment runs 24 hours a day. Electricity usage increases, but the added cost is typically covered by insurance. Technicians visit daily to check readings and adjust equipment. Don't move or reposition anything between visits — placement is deliberate. Keep doors to affected areas open unless the crew instructs otherwise.
Timeline: Structural drying typically takes 3 to 5 days for a contained Category 1 event. Larger losses, Category 2 or 3 events, or dense materials like concrete can take 5 to 10 days. No reputable company pulls equipment based on a calendar — drying is done when the readings confirm it.
Step 5: Cleaning and Sanitizing
Once materials are dry — or in parallel with drying for contaminated water events — cleaning and sanitizing addresses residue, bacteria, and contaminants that water leaves behind.
The protocol depends on the water category. For Category 1 events, surfaces are wiped down and treated with antimicrobial solutions to prevent mold colonization. For Category 2 and 3 events, all surfaces that contacted contaminated water are treated with professional-grade antimicrobial and antibacterial solutions. HEPA vacuuming removes settled particulates from surfaces, cavities, and ductwork. Hard surfaces are scrubbed and disinfected. Salvageable soft contents may be cleaned through specialized processes or sent for off-site professional cleaning.
Odor is addressed during this phase as well. Water damage frequently produces musty smells from microbial activity and contaminant residue. Air scrubbers with activated carbon filters, thermal fogging, or hydroxyl generators neutralize persistent odors rather than masking them.
Equipment: HEPA vacuums, air scrubbers with HEPA and carbon filters, professional-grade antimicrobial solutions, ULV (ultra-low volume) foggers for reaching difficult surfaces, and hydroxyl generators for molecular-level odor elimination.
Timeline: Cleaning typically takes 1 to 2 days for standard residential losses, often overlapping with the final stages of drying. Category 3 events with biohazard protocols may require additional time.
Step 6: Mold Prevention and Verification
This step bridges water damage restoration and mold remediation — and separates a restoration that's truly complete from one that creates problems months later.
Even with aggressive extraction and thorough drying, mold-favorable conditions existed in your property for some period. A final round of moisture mapping confirms that every affected area — including wall cavities, subfloors, and materials around the perimeter of the originally mapped damage — has returned to normal levels. If any areas show elevated readings, drying continues.
For larger losses or situations where drying took longer than expected, post-restoration mold testing may be recommended. An independent party collects air and surface samples and compares results against unaffected areas. This is particularly important for insurance documentation.
The team also advises on conditions that contributed to the water damage or could create future moisture problems — poor ventilation, inadequate drainage, aging plumbing, or humidity management. Addressing these is essential because repeated water damage creates cumulative structural deterioration and significantly increases mold risk.
You'll receive final moisture documentation showing readings across all affected areas compared against baseline. If mold testing is conducted, results typically take 2 to 5 business days. Clean results move the project to reconstruction. Elevated mold levels trigger mold remediation before any reconstruction begins.
Timeline: Final verification takes half a day to a full day. Mold testing results, if conducted, add 2 to 5 business days.
Step 7: Restoration and Reconstruction
The final phase returns your property to its pre-loss condition. Reconstruction addresses everything removed during restoration — from carpet padding and baseboards to drywall, insulation, flooring, and cabinetry.
The scope depends directly on what was removed. A minor Category 1 event may require only padding reinstallation, baseboard replacement, and touch-up painting. A significant Category 3 event may require new drywall, insulation, flooring, trim, and paint throughout multiple rooms. Reconstruction follows a logical sequence: structural repairs, insulation, wall surfaces, flooring, trim, and finally painting.
One critical point: reconstruction does not begin until drying is verified complete and, if applicable, mold testing results confirm the property is clean. Closing up walls over materials that haven't been fully verified is exactly how restoration projects create secondary mold problems. Reputable companies won't do it, and you shouldn't allow it.
Timeline: Minor repairs take 1 to 3 days. Moderate reconstruction (drywall, flooring, painting in one to two rooms) typically takes 1 to 2 weeks. Extensive reconstruction involving multiple rooms or structural repairs can take several weeks.
Total Process Timeline
Small contained loss (single room, Category 1): Extraction on day one, drying for 3 to 5 days, cleaning and verification, minor reconstruction. Total: approximately 1 to 2 weeks.
Moderate loss (multiple rooms, Category 1 or 2): Extraction over 1 to 2 days, drying for 4 to 7 days, cleaning, verification, reconstruction. Total: approximately 3 to 5 weeks.
Significant loss (large area, Category 3): Extraction and material removal over 1 to 3 days, drying for 5 to 10 days, biohazard cleaning, verification, extensive reconstruction. Total: approximately 5 to 8 weeks or longer.
Every day of delay at the front end extends the back end — as water migrates further, categories escalate, more material needs removal, and the risk of mold remediation being added to the scope increases.
Water Damage Restoration FAQs
Do I need to leave my home during water damage restoration?
For a contained loss in a single room, most homeowners stay home — though drying equipment running 24/7 is noisy. For Category 3 events, large-scale losses, or situations where major areas are inaccessible, temporary relocation may be necessary. Most homeowner's insurance policies cover additional living expenses.
Will my insurance cover professional water damage restoration?
Most standard California homeowner's policies cover sudden, accidental water damage — burst pipes, appliance failures, accidental overflows. They typically exclude gradual leaks, deferred maintenance, and exterior flooding (which requires separate flood insurance). Professional documentation is essential for claim processing. See our full guide on water damage insurance claims in California.
What's the difference between water mitigation and water restoration?
Mitigation is the emergency phase — stopping the water, extracting, and setting up drying equipment to prevent further damage. Restoration is the complete process from emergency response through verified drying, cleaning, mold prevention, and full reconstruction. Both are necessary and typically covered by insurance.
Can I do any of the restoration steps myself?
For small, clean-water events on hard surfaces in a single area, homeowners can handle basic extraction and drying. But professional restoration involves equipment and moisture verification that DIY efforts cannot replicate for anything beyond minor incidents. Inadequate drying leading to hidden mold growth means saving money upfront often costs significantly more later.
How do I know when drying is actually complete?
When moisture meter readings across all affected materials return to levels consistent with unaffected materials — not when surfaces feel dry. Professionals document daily readings and compare them against baseline readings from the initial assessment.
What happens if mold is found during restoration?
The scope expands to include mold remediation — containment, material removal, HEPA air filtration, antimicrobial treatment, and clearance testing before reconstruction begins. Catching mold during restoration rather than discovering it months later is the best-case scenario for a bad situation.
How should I choose a water damage restoration company?
Look for IICRC certification, proper licensing and insurance, 24/7 emergency availability, daily moisture monitoring with documented readings, experience with insurance carriers, and the ability to handle the full process from extraction through reconstruction.
Will the restoration company work with my insurance company?
Most professional companies work with carriers regularly — communicating with adjusters, providing documentation in expected formats, and supporting smooth claim processing. They work for you, but their protocols meet the standards insurers require for claim approval.
How quickly should I call a restoration company after water damage?
Immediately. The difference between calling now and calling tomorrow is often the difference between a drying project and a mold remediation project. Mold begins colonizing within 24 to 48 hours, and water categories escalate on the same timeline.
What should I do right now if I have water damage?
Stop the water source. Cut power to affected areas if water has reached outlets. Document everything with photos and video. Then call a professional. Call (888) 609-8907 or request a free estimate to get the process started.
Get Your Property Restored the Right Way
Water damage restoration is a systematic process where each step protects the next. Skip or shortcut any phase and you compromise everything that follows. Professional restoration done correctly, starting promptly, means your property comes back to pre-loss condition without the secondary damage that plagues incomplete or delayed responses.
MoldRx coordinates professional water damage restoration and emergency services throughout Orange County, Riverside County, and San Bernardino County. Our vetted professionals follow IICRC S500 protocols on every project — from initial moisture readings through verified drying and completed reconstruction.
Call (888) 609-8907 to talk to a real person about your water damage situation. Or request a free estimate online — no scripts, no pressure, just honest guidance from a family-owned company that does things right.
Water Damage Restoration | Emergency Services | Mold Removal | Mold Testing | All Services | Service Areas