A leaking roof doesn't just damage shingles and sheathing. It creates one of the most productive mold environments inside a home — a dark, enclosed cavity above the ceiling where water can saturate organic materials and stay wet for weeks or months without anyone knowing.
A roof leak creates the perfect hidden mold environment: water enters the attic, soaks insulation and roof sheathing, and stays wet in a dark, unventilated space. Unlike a burst pipe on a kitchen floor that demands immediate attention, a roof leak can drip silently into the attic for an entire rainy season. By the time a stain appears on the bedroom ceiling or a musty smell settles into a hallway, mold has often colonized the sheathing, rafters, insulation, and possibly the wall cavities below the leak point.
This guide covers the timeline from leak to mold colony, where that mold grows, what makes Southern California roofs vulnerable, how to recognize the problem, why patching the roof isn't enough, and how the full repair sequence works.
How a Roof Leak Causes Mold: The Timeline
Understanding how fast mold grows after water damage is critical because the timeline from leak to colony is shorter than most homeowners expect.
Hours 0-24: Water Entry
A cracked tile, failed flashing joint, or deteriorated underlayment allows rainwater past the roof surface. Water runs along the underside of the sheathing, following gravity and the roof slope. It may travel several feet from the breach before dripping onto insulation, framing, or the backside of ceiling drywall — which is why the water stain on your ceiling is often nowhere near the actual roof defect.
Hours 24-48: Colonization Begins
Mold spores already exist on every surface in the attic. Within 24 to 48 hours of sheathing and insulation becoming wet, those dormant spores begin germinating. Nothing is visible yet — the colonization is microscopic, happening inside the wood grain and within insulation fibers.
Days 3-14: Visible Growth Establishes
Within one to two weeks, mold colonies become visible — dark patches on sheathing, discoloration on rafters, fuzzy growth on insulation. A single roof leak that wets a four-foot section of sheathing can produce visible mold across a much larger area as moisture wicks through the wood and humidity elevates throughout the attic.
Weeks to Months: Spread and Secondary Damage
If the leak persists through multiple rain events — common with intermittent leaks that only admit water during wind-driven rain — the colony expands along sheathing, down rafters, through insulation, and into ceiling drywall and wall cavities below. At this stage, contamination has migrated into materials that will need to be removed and replaced.
Where Mold Grows After a Roof Leak
Roof-leak mold doesn't stay at the point of entry. Water follows gravity, capillary action, and vapor pressure into every material it contacts. Understanding where to look — and where contamination hides — is central to effective remediation.
Roof Sheathing (Underside of the Roof Deck)
The plywood or OSB sheathing is the first surface water contacts after breaching the roofing material and the surface with the most sustained moisture exposure, since water runs along the underside before dripping free. Sheathing mold typically appears as dark gray or black staining, sometimes following the path water traveled from the leak point.
Insulation
Fiberglass batts and blown-in insulation absorb and hold water, losing thermal performance and becoming a long-term moisture reservoir that keeps the surrounding area damp long after the leak stops. Mold colonizes wet insulation readily, and because contamination penetrates throughout the material, affected insulation cannot be cleaned — it must be removed and replaced.
Rafters, Trusses, and Collar Ties
Structural framing in contact with the leak path absorbs moisture through end grain and surface exposure. Mold appears as discoloration or fuzzy growth, concentrated where water pooled or dripped consistently. Left unchecked, chronic moisture leads to both mold contamination and wood decay — a structural concern beyond the mold issue.
Ceiling Drywall (Top Side)
Water dripping through insulation reaches the backside of ceiling drywall, where the paper facing is an excellent mold food source. Mold colonizes the top side — the side you can't see — while the bottom may show only a faint stain. By the time the ceiling shows visible damage, the mold on the hidden side is usually extensive.
Wall Cavities Below the Leak
When a roof leak occurs near the eaves or where the roof meets a wall, water can run down inside the wall cavity — creating the same concealed mold conditions described in our guide on water damage behind walls. The signs of mold behind walls — musty smell, paint bubbling, persistent allergy symptoms — may be the only clues that contamination has spread below the attic.
SoCal Roof-Specific Factors
Southern California's construction practices and climate create specific roof vulnerabilities that make leak-related mold more likely here than homeowners expect.
Tile Roofs and Underlayment Degradation
Concrete and clay tile roofs are standard across Southern California. The tiles themselves are nearly indestructible, which gives homeowners a false sense of security. But tiles are not the waterproofing layer — the felt or synthetic underlayment beneath them is. That underlayment degrades over time from UV exposure at the edges, heat cycling, and foot traffic during maintenance. When the underlayment fails, water passes through the tile field and reaches the sheathing. Because the tiles still look perfect from the ground, the leak can go undetected for years.
Flashing Failure at Penetrations
Every roof penetration — plumbing vents, HVAC curbs, skylights, chimneys — relies on flashing to seal the gap between the penetration and the roofing material. Flashing fails from thermal expansion and contraction, sealant deterioration, and corrosion. In Southern California, where roof surfaces can exceed 160 degrees in summer, the thermal cycling is extreme. Failed flashing at a single plumbing vent can channel water onto the sheathing during every rain event for years.
Concentrated Rainfall Pattern
As outlined in our rainy season protection guide, Southern California receives most of its annual rainfall in short, intense bursts. A roof with a minor vulnerability can admit significant water during a single atmospheric river event — saturating sheathing, insulation, and framing in one storm. Then the dry season returns, and the homeowner assumes everything is fine while mold grows in the dark above the ceiling.
Complex Rooflines and Valley Flashing
The multi-hip, multi-valley rooflines common in Southern California subdivisions create numerous intersections where roof planes meet. Each valley concentrates water flow, and the flashing at these junctions is subject to debris accumulation, thermal movement, and sealant failure. A flashing failure at a valley admits more water per storm than a failure elsewhere on the roof — and many SoCal homes also incorporate low-slope or flat roof sections over additions and garages that are especially prone to ponding and leak-related mold.
Signs of Roof-Leak Mold
Roof-leak mold develops above the ceiling, out of sight. The signs you notice from inside the home are secondary indicators — the mold itself is usually far more extensive than what these clues suggest.
Ceiling Stains That Return After Painting
A brown or yellowish water stain on the ceiling is the most common initial sign. If you paint over it and it returns, water is still reaching the drywall from above — and the conditions producing that stain have almost certainly produced mold on the surfaces you can't see. Stains that appear or darken after rain are especially diagnostic of an active roof leak.
Musty Smell in Specific Rooms
A persistent musty odor in a bedroom, closet, or hallway — particularly one that intensifies on warm days — often traces to mold growing above the ceiling. The smell migrates through ceiling light fixtures, HVAC vents, and gaps around ceiling fans. If the odor is localized to rooms on the top floor or directly below the attic, roof-leak mold is a leading possibility.
Attic Discoloration and Visible Growth
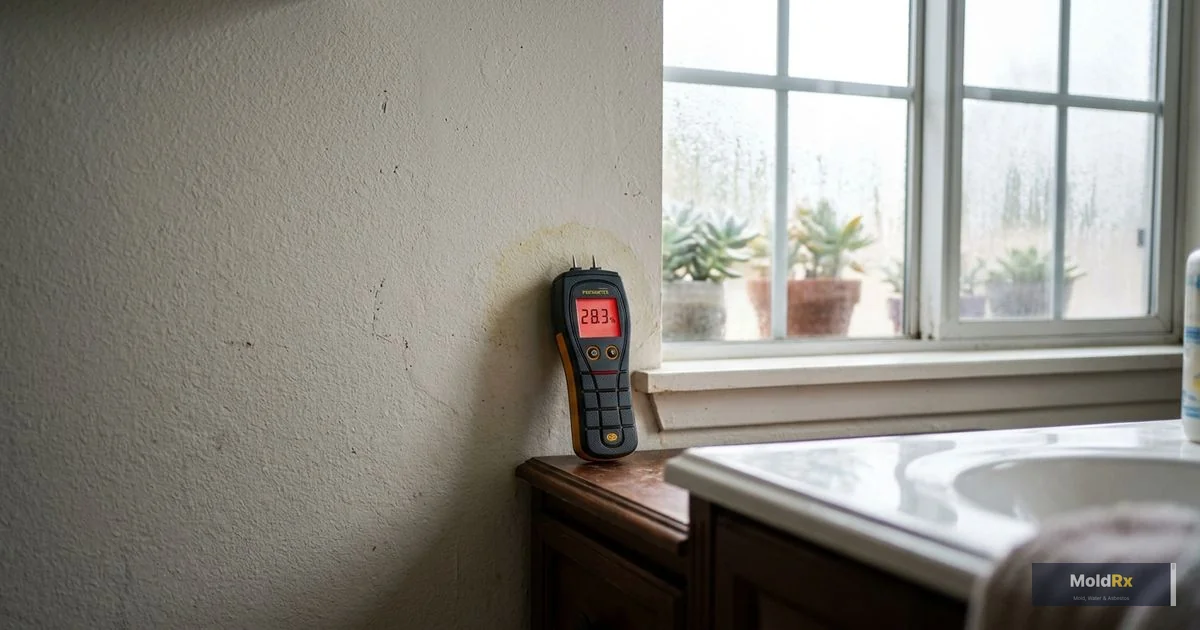
If you can access the attic, look at the underside of the roof sheathing with a flashlight. Healthy sheathing is a uniform light color. Dark staining, black patches, or visible fuzzy growth on the sheathing, rafters, or insulation confirms mold. Pay particular attention to areas around roof penetrations, valleys, and anywhere you see water staining or mineral deposits — white crystalline residue left by water as it evaporates.
Paint Bubbling or Drywall Softness on Ceilings
Moisture migrating through the ceiling can cause paint to bubble, blister, or peel. The ceiling drywall may feel soft or spongy to the touch in the affected area. These are signs of active moisture — not a historical stain — and indicate that the leak path is still delivering water and the mold risk is current.
Unexplained Respiratory Symptoms on the Top Floor
If household members experience congestion, headaches, or worsened asthma primarily in upstairs bedrooms — symptoms that improve when they sleep elsewhere — elevated mold spore levels from contamination above the ceiling are a plausible cause.
Why Patching the Roof Isn't Enough
Homeowners who discover a roof leak naturally call a roofer. The roofer fixes the leak — replacing a cracked tile, resealing flashing, patching underlayment. The leak stops. The homeowner assumes the problem is solved.
It isn't.
Fixing the roof stops new water from entering. It does nothing about the mold that has already colonized the sheathing, insulation, rafters, and ceiling drywall. That existing mold doesn't die when the water stops — it becomes dormant, but the colony remains and the contaminated materials continue producing spores that drift into the living space. When moisture returns from condensation or elevated humidity, the colony reactivates. This is a common version of the pattern described in our guide on why mold keeps coming back: the ceiling stain gets painted, the roof gets patched, and six months later the musty smell returns because the mold was never removed.
Roof repair is necessary — but it's step one, not the complete solution.
The Full Repair Sequence
Eliminating mold from a roof leak requires a specific sequence. Skipping steps or reordering them leads to rework, recurring contamination, or damage to new materials.
Step 1: Roof Repair
The water source must be stopped first. A qualified roofer identifies and repairs the leak — whether it's failed flashing, cracked tiles, deteriorated underlayment, or valley damage. Until the roof is watertight, any work below it is premature. Mold remediation on sheathing that's still getting wet during rain events is wasted effort.
Step 2: Mold Assessment
Once the roof is repaired, a mold assessment documents the extent of contamination. This involves visual inspection of the attic, moisture readings on sheathing and framing, and air or surface sampling to identify the mold species and concentration. The assessment defines the scope of remediation — which materials need treatment, which need removal, and what containment is required.
Step 3: Remediation
Professional mold remediation follows the scope defined by the assessment. For roof-leak mold, this typically includes containment with HEPA-filtered negative air machines, removal of contaminated insulation, soda blasting of affected sheathing and framing (the standard treatment for large-area contamination, as described in our attic mold guide), removal of any mold-colonized ceiling drywall, HEPA vacuuming and antimicrobial treatment of all surfaces, and independent clearance testing confirming spore counts are at or below normal levels.
Step 4: Insulation Replacement and Restoration
After clearance, new insulation is installed in the remediated areas. If ceiling drywall was removed, it's replaced, finished, and painted. Any ventilation deficiencies identified during the assessment are corrected at this stage — adding soffit vents, clearing blocked eave areas, or installing baffles to maintain airflow channels.
Insurance Considerations
Whether homeowner's insurance covers mold from a roof leak depends on how the leak is classified.
Sudden and Accidental Events
If the roof leak resulted from a sudden event — a tree limb during a storm, wind damage displacing tiles, hail impact — the resulting water damage and mold are typically covered under a standard homeowner's policy. The key word is "sudden." The damage must result from a specific, identifiable event rather than a gradual process.
Gradual or Maintenance-Related Leaks
If the leak developed gradually — underlayment that deteriorated over years, flashing that slowly separated, tiles that cracked from age — insurance typically denies the claim. Homeowner's policies exclude damage from deferred maintenance, wear and tear, and gradual deterioration. The mold that results from a maintenance-related leak falls under the same exclusion.
The Gray Area and Coverage Limits
Many roof leaks sit between these categories. A storm may have displaced a tile, but the underlayment was already compromised. Insurance adjusters evaluate these situations case by case. Thorough documentation — photos of the roof damage, the mold contamination, and the professional assessment — strengthens any claim. Our guide on how to document damage for insurance claims covers the specifics. Even when a claim is approved, many California policies cap mold coverage at $5,000 to $10,000 — an amount that may not cover extensive attic remediation. Review your policy's mold endorsement before you need it.
Mold From Roof Leaks: 10 FAQs
How quickly does mold grow from a roof leak?
Mold spores can begin colonizing wet sheathing and insulation within 24 to 48 hours of water exposure. Visible growth typically appears within one to two weeks. If your attic was wet from a roof leak for more than a few days, mold growth is likely — even if you can't see it from the living space below.
Can a small roof leak cause mold?
Yes. A small, slow leak that wets the same section of sheathing during every rain event creates chronic moisture conditions ideal for mold. The volume of water matters less than the duration of wetness. A slow drip over an entire rainy season can produce more mold than a large, one-time water event that dries quickly.
How do I know if there's mold behind my ceiling from a roof leak?
Recurring ceiling stains, a musty smell in rooms below the attic, paint bubbling on the ceiling, or soft spots in the ceiling drywall are the most common indicators. The only way to confirm mold behind the ceiling is inspection from the attic side or professional mold testing with air or surface sampling.
Will mold from a roof leak go away on its own once the leak is fixed?
No. Fixing the roof stops new water from entering, but it does not eliminate mold that has already colonized the sheathing, insulation, and framing. Dormant mold remains on the materials, continues producing spores, and reactivates when moisture returns. Existing mold must be physically removed through professional remediation.
Can I just replace the insulation and skip mold remediation?
Replacing contaminated insulation removes one affected material, but if mold is growing on the sheathing and rafters above it, the new insulation will be recontaminated by the existing colonies. Sheathing and framing must be treated first — new insulation goes in after clearance testing confirms the space is clean.
Is roof-leak mold dangerous?
Mold from a roof leak produces the same health risks as mold from any moisture source — respiratory irritation, allergic reactions, headaches, and worsened asthma. The specific concern is that it grows in a large, concealed space above occupied rooms, with spores migrating downward through ceiling penetrations into the air household members breathe.
My roofer says there's no mold. Should I trust that assessment?
Roofers are experts in roofing systems, not mold assessment. A roofer may not recognize early-stage colonization on sheathing or may not inspect beyond the immediate leak area. If a roof leak was active for more than a short period, an independent mold assessment by a qualified professional is the appropriate next step.
How much does roof-leak mold remediation cost?
Cost depends on the extent of contamination — how much sheathing is affected, whether insulation and ceiling drywall need replacement, and the size and accessibility of the attic. Contact us for a free estimate specific to your situation rather than relying on generic pricing ranges.
Does the entire roof need to be replaced if there's mold on the sheathing?
Usually not. If the leak has been repaired and the sheathing is structurally sound, mold can be removed through soda blasting without disturbing the roofing material above. Only when sheathing has lost structural integrity — soft, delaminated, or rotted from chronic water exposure — do those sections need replacement, which requires removing the roofing material in the affected area.
How do I prevent mold from a roof leak in the future?
Annual roof inspections — especially before the rainy season — catch cracked tiles, failing flashing, and deteriorating underlayment before they become leak-to-mold pathways. Ensure your attic has adequate ventilation so incidental moisture dries before mold establishes, and address any leak immediately rather than waiting for the dry season.
Stop the Leak, Then Stop the Mold
A roof leak is a roofing problem. Mold from a roof leak is a separate problem — one that persists after the roof is repaired if the contaminated materials aren't addressed. The pattern is predictable: water enters, mold grows, the roof gets patched, and the mold stays hidden above the ceiling producing spores that drift into the living space below.
The sooner both problems are addressed in sequence, the smaller the scope of work. Waiting allows contamination to spread from the initial leak area into surrounding sheathing, wall cavities, and larger sections of the attic.
If you've had a roof leak — even one that's already been repaired — and you're noticing ceiling stains, musty odors in upstairs rooms, or respiratory symptoms that don't have another explanation, the next step is finding out what's happening above the ceiling.
MoldRx provides professional mold testing and mold remediation along with water damage restoration throughout Southern California. We'll assess the attic honestly and tell you exactly what's needed — whether that's full remediation or confirmation that the leak was caught early enough that mold never established.
Call (888) 609-8907 to talk through what you're seeing, or request a free estimate online.