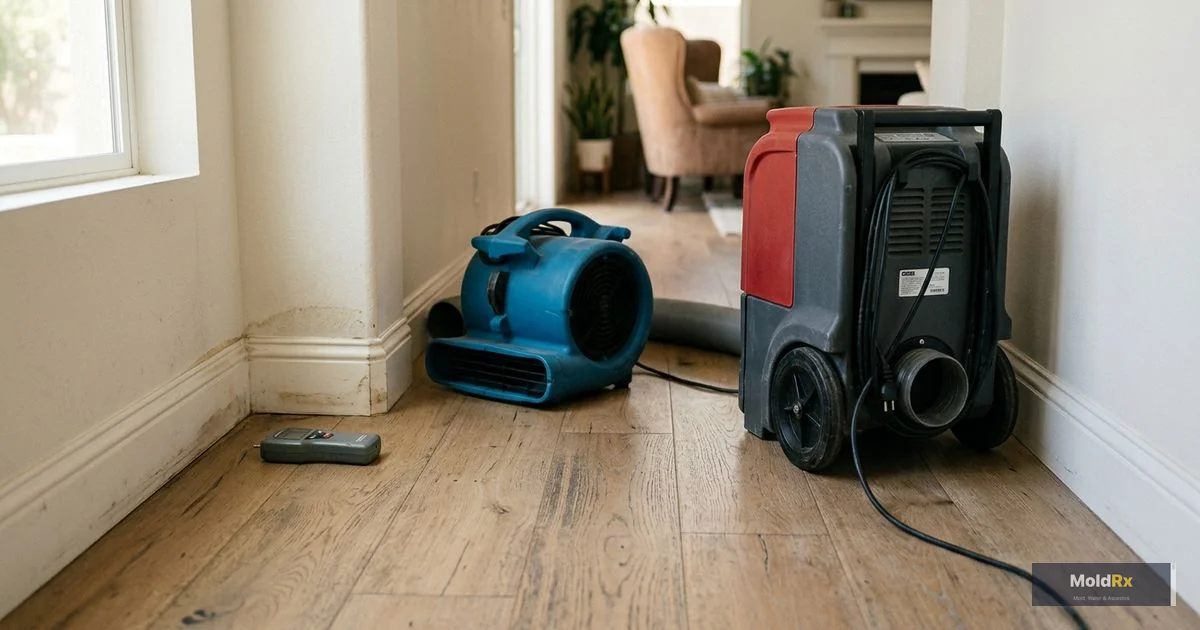
Reconstruction is the final phase of water damage restoration — and it only begins after structural drying is verified complete. Not when surfaces feel dry. Not when the fans come down. When moisture meter readings across every affected material confirm that levels have returned to normal.
This guide covers the full reconstruction sequence: clearance verification, what typically needs replacement, realistic timelines, insurance coordination, material upgrades worth considering, and how to match existing finishes. For homeowners still in the earlier phases, our step-by-step restoration process guide covers everything from emergency response through drying.
Why Reconstruction Doesn't Start Until Drying Is Verified
This is where projects go wrong. Closing up walls or replacing cabinetry over materials that still hold moisture creates the exact conditions mold needs to colonize. Once new drywall is installed over a moisture problem, you won't know until the mold is established — often months later — at which point the new materials come out and the process starts over.
Professional companies verify drying through documented moisture readings, not timelines. They compare readings across all affected materials against baselines from unaffected materials in the same structure. Wood framing, subfloor sheathing, and concrete all need to reach acceptable levels before new drywall goes up.
This "drying clearance" is the gatekeeping step that separates a reconstruction that lasts from one that leads to mold growth behind walls within months.
Clearance Verification Before Rebuild
Before reconstruction begins, the restoration team — or in some cases an independent third party — conducts a final moisture assessment of every area that will be enclosed by new materials. Here's what that involves.
Moisture Mapping
Technicians take moisture readings across all structural materials using pin-type and pinless moisture meters, comparing against baselines from the initial assessment and unaffected reference materials. The goal is equilibrium — affected materials should read within a few percentage points of materials that were never wet.
Thermal Imaging
Infrared cameras scan walls, subfloors, and ceilings for temperature anomalies that indicate residual moisture the meters may have missed. Cold spots behind walls or under flooring can signal moisture that hasn't fully dissipated.
Mold Verification
For larger losses, projects where drying took longer than anticipated, or situations involving Category 2 or Category 3 water, post-drying mold testing may be conducted before reconstruction. An independent testing company collects air and surface samples and compares results against unaffected areas. Clean results clear the project for rebuild. Elevated mold levels mean mold remediation happens first — before a single new material is installed.
Documentation Handoff
The restoration team provides final moisture documentation to the reconstruction team: pre-loss baseline readings, peak moisture readings, and final clearance readings, plus mold testing results if conducted. This paperwork is critical for insurance claims — it proves the underlying work was completed to standard before reconstruction began.
What Typically Needs Replacement After Water Damage
What gets removed during restoration — and therefore what needs to be rebuilt — depends entirely on the scope and category of the water event. Here's what typically comes out and needs to go back in, from the most commonly affected materials to the least.
Drywall
Drywall is the material most frequently removed during restoration. It absorbs water readily, loses structural integrity when saturated, and harbors mold within its paper facing. Standard practice removes drywall at least 12 to 24 inches above the visible waterline — moisture wicks upward well beyond where you can see it.
Reconstruction involves hanging new drywall, taping, mudding, texturing to match, and painting. For partial-wall replacements ("flood cuts"), the challenge is blending the new section with the existing wall above.
Flooring
What happens to flooring depends on the material and exposure duration.
Carpet and padding: Padding is almost always removed because it absorbs and holds moisture. Carpet can sometimes be saved in Category 1 events with fast extraction, but in Category 2 or 3 events, both come out entirely.
Hardwood: Solid hardwood can sometimes be dried in place if caught early, but prolonged exposure causes warping, cupping, and buckling that can't be reversed. Engineered hardwood is more vulnerable because the layered construction traps moisture between layers.
Laminate: Laminate generally doesn't survive significant water exposure. The fiberboard core swells and doesn't return to original dimensions. Replacement is standard.
Tile: Tile itself is water-resistant, but the subfloor beneath it may not be. If the subfloor is damaged, tiles come up for subfloor repair and are reinstalled or replaced.
Vinyl (LVP/LVT): Luxury vinyl is waterproof at the plank level, but water trapped beneath it creates problems. Planks come up for drying and are typically reinstalled if undamaged.
Insulation
Fiberglass batt insulation is routinely removed during restoration — it absorbs water, loses insulating value, and dries extremely slowly, making it a persistent moisture source and mold risk. Replacement insulation goes in during reconstruction after framing is verified dry.
Baseboards and Trim
Baseboards are among the first things removed during restoration to access wall cavities for drying. Solid wood baseboards in good condition can often go back up. MDF baseboards that absorbed water swell irreversibly and need replacement. Crown molding, door casing, and window trim in affected areas may also need replacement.
Cabinetry
Kitchen and bathroom cabinets present a particular challenge. Solid wood cabinets may survive if drying was prompt. Particleboard or MDF cabinet boxes — common in standard-grade kitchens — absorb water, swell, and lose structural integrity. Toe kicks and bottoms of base cabinets fail first because they sit closest to the water source.
Replacement ranges from swapping individual boxes while keeping doors and hardware to full cabinet replacement. Matching cabinets no longer manufactured is one of the more common challenges in partial kitchen reconstruction.
Subfloor
Plywood subflooring can often be dried and saved. OSB (oriented strand board) subflooring is more vulnerable — it absorbs water more readily and can delaminate. Damaged sections of subfloor are cut out and replaced during reconstruction, which must happen before any new finish flooring goes down.
Electrical and Plumbing
Outlets, switches, and wiring in affected walls are inspected and replaced as needed — submerged electrical components are typically replaced for safety. Plumbing fixtures and connections in affected areas are inspected and repaired, particularly if the original damage was plumbing-related.
Reconstruction Timeline by Scope
Reconstruction timelines vary based on the extent of material removal, the complexity of finishes that need matching, and whether custom materials (special-order flooring, cabinetry, countertops) are involved. Here are realistic ranges for common scenarios.
Minor Reconstruction (1 to 3 Days)
A contained Category 1 event in a single room — typical of a supply line leak caught within hours. The scope usually involves replacing carpet padding, reinstalling baseboards, patching and painting the lower portion of one or two walls, and minor touch-up work. Materials are readily available and the crew can complete the work in a few visits.
Moderate Reconstruction (1 to 3 Weeks)
A multi-room loss requiring drywall replacement, new flooring, insulation, trim, and painting across two to four rooms. This is the most common reconstruction scope for residential water damage — significant enough that multiple trades are involved (drywall, flooring, painting) but not so extensive that structural work is needed. Material procurement adds lead time, particularly if you're matching existing flooring or selecting new materials.
Major Reconstruction (3 to 8 Weeks)
Large-scale losses involving multiple rooms, structural repairs, cabinet replacement, subfloor replacement, and extensive finish work. Trades work sequentially — structural repairs before drywall, drywall before painting, subfloor before finish flooring — and material lead times for custom items (cabinetry, countertops, specialty flooring) can add weeks.
What Extends a Reconstruction Timeline
Several factors push timelines beyond these ranges: custom-order materials that take weeks to arrive, matching discontinued flooring or paint, discovering additional damage once walls are opened (particularly hidden mold), insurance supplement disputes, permit requirements for structural or electrical work, and tradespeople availability.
Working With Insurance on Reconstruction
Insurance coordination during the reconstruction phase has its own dynamics, distinct from the emergency mitigation and drying phases. Understanding how this works helps you avoid the most common frustrations.
Mitigation vs. Reconstruction Claims
Many carriers treat mitigation (emergency response, extraction, drying) and reconstruction as separate line items or even separate claims. The mitigation company may bill the carrier directly, while reconstruction costs go through a separate approval process. Your adjuster reviews the reconstruction scope before work begins — getting started quickly depends on thorough documentation from the restoration phase.
Matching and Line-of-Sight
Insurance policies require restoration to pre-loss condition, including matching existing materials. When materials can't be matched exactly — discontinued tile, flooring no longer in production, faded paint — the scope may expand. The "line-of-sight" principle applies: if a repaired area looks noticeably different alongside the original, the carrier may cover extending the replacement to a natural break point (doorway, room boundary) so the result looks uniform.
Supplements and Change Orders
It's common for the scope to need adjustment once work begins — opening a wall may reveal hidden damage, or matching materials may cost more than estimated. These changes are communicated to the adjuster as supplements. Supplements are normal and expected, and they're approved most smoothly when documented with photos, written justification, and a clear connection to the original loss.
Depreciation and Recoverable Costs
Many policies pay actual cash value (ACV) upfront and release the recoverable depreciation once repairs are completed. You may receive a partial payment initially, complete reconstruction, and then submit completion documentation to receive the remaining funds. Understanding this payment structure before reconstruction starts prevents cash flow surprises.
For a broader overview, see our guide on water damage insurance claims in California.
Mold-Resistant Materials and Upgrades to Consider During Rebuild
Reconstruction is one of the few opportunities to upgrade materials without the cost of a full renovation — the affected materials are already coming out. Insurance typically covers standard replacement, so you pay only the difference for upgrades. Here are options worth considering.
Mold-Resistant Drywall
Standard drywall uses paper facing — the same organic material mold feeds on. Mold-resistant drywall replaces that paper facing with fiberglass or treated paper that resists mold growth. It costs more per sheet but eliminates the primary food source mold targets in wall assemblies. For bathrooms, kitchens, laundry rooms, and any area with regular moisture exposure, this upgrade is particularly worthwhile.
Water-Resistant Flooring
If carpet or hardwood was damaged, consider waterproof alternatives. Luxury vinyl plank (LVP) and luxury vinyl tile (LVT) are fully waterproof — they won't absorb water, swell, or support mold growth. Porcelain tile is another inherently waterproof option. These materials don't prevent structural water damage beneath them, but they survive the event and don't need replacement if water exposure recurs.
Closed-Cell Spray Foam Insulation
Standard fiberglass absorbs and retains water. Closed-cell spray foam is moisture-resistant, acts as its own vapor barrier, and adds structural rigidity. It costs more but won't absorb water in a future event and doesn't support mold growth.
Antimicrobial-Treated Materials
Some drywall, insulation, and paint products include antimicrobial agents that inhibit mold growth. No material is "mold-proof," but these treatments add resistance that standard materials lack. Mold-resistant paint primer is one of the simplest and least expensive upgrades available.
Improved Ventilation
If the affected area includes a bathroom, kitchen, or laundry room, reconstruction is the ideal time to upgrade exhaust fans or install humidity-sensing switches that activate automatically. Reducing ambient humidity is one of the most effective long-term mold prevention strategies.
Accessible Shutoff Valves
If the original damage was plumbing-related, consider adding accessible shutoff valves during reconstruction — behind toilets, under sinks, at washing machine connections. Quick shutoff access reduces a future leak's duration from hours to seconds.
Matching Existing Finishes
Making repaired areas blend with the rest of the home is a skill that separates experienced reconstruction teams from general contractors who don't specialize in restoration work.
Paint Matching
Even with the original color name, fresh paint won't match a wall that has years of UV exposure and wear. Experienced contractors address this by painting wall-to-wall (corner to corner) rather than just the repaired section. Color-matching technology can get close, but the sheen and aging of existing paint matter just as much as the color.
Texture Matching
California homes frequently feature textured finishes — orange peel, knockdown, skip trowel. Matching texture on a patch to the surrounding wall requires technique and practice. Ask to see examples of texture matching from your reconstruction contractor before work begins.
Flooring Transitions
When flooring replacement doesn't cover the entire room, transitions between old and new need to be handled intentionally. Using doorways, room boundaries, or natural transition points as the dividing line produces a much cleaner result than a seam in the middle of a room. For hardwood, even well-matched new and old sections age differently — extending replacement to a natural break point is almost always the better approach.
Cabinetry and Trim
Matching cabinet styles and finishes from a kitchen that's ten or twenty years old is one of the most challenging aspects of partial reconstruction. Refacing existing cabinets alongside new boxes can create a more uniform result than hunting for discontinued matches. For trim and molding, custom milling can replicate profiles no longer commercially available, though it adds cost and lead time.
What Homeowners Should Do During Reconstruction
Your role during reconstruction is different from the emergency and drying phases. Here's what to focus on.
Review the scope of work before it starts. Understand what's being replaced, what materials are being used, and what the finished result should look like. Confirm what insurance covers versus your out-of-pocket cost for any upgrades.
Make material selections promptly. Delays in choosing flooring, paint colors, or cabinet options are one of the most common causes of extended timelines.
Document everything. Photograph the reconstruction at each stage — framing exposed, insulation installed, drywall hung, finished product. This protects you if questions arise later about what work was done.
Communicate with your adjuster. If the scope changes, inform your adjuster promptly. Supplements submitted with real-time documentation are approved more smoothly than those submitted weeks after the fact.
Do a thorough walk-through before signing off. Check paint finish, texture match, flooring transitions, cabinet alignment, and trim fit. It's easier to address punch-list items while the crew is still on site.
Water Damage Reconstruction FAQs
How long after drying can reconstruction begin?
Immediately after drying clearance is documented. If post-drying mold testing is conducted, you'll wait for results (typically 2 to 5 business days) before starting. There's no benefit to waiting beyond clearance.
Can I use a different contractor for reconstruction than the one who handled restoration?
Yes, but using the same company for both has advantages — they already understand the full scope and have all moisture documentation. If you choose a separate contractor, make sure the restoration team provides complete documentation including moisture readings, material removal photos, and the clearance report.
Does insurance cover upgrades during reconstruction?
Insurance covers returning your property to its pre-loss condition using like-kind-and-quality materials. If you want to upgrade — mold-resistant drywall instead of standard, luxury vinyl instead of carpet — insurance typically covers the cost of the standard replacement, and you pay the difference.
What if I find mold during reconstruction?
If mold is discovered once walls are opened for reconstruction, work stops in the affected area. The mold must be remediated and cleared before reconstruction continues. This is frustrating but necessary — and it's better to find it now than after the walls are closed up. Mold found during reconstruction may be covered under the original claim or require a supplemental claim.
How do I know if my contractor is qualified for water damage reconstruction?
Look for IICRC certification, experience specifically with insurance restoration (not just general remodeling), familiarity with supplement processes, and examples of finish-matching work. Contractors who specialize in restoration reconstruction understand challenges — moisture verification, insurance coordination, material matching — that general contractors may not.
Will my home look the same after reconstruction?
That's the goal, and experienced teams achieve it routinely. The most common areas where differences show are paint matching (new vs. aged), drywall texture, and flooring transitions. Extending paint or flooring to natural break points rather than patching mid-wall or mid-room produces the best results.
Do I need permits for water damage reconstruction?
Most cosmetic work — drywall, flooring, painting, trim — doesn't require permits. Structural repairs, electrical work, and plumbing modifications typically do. Your contractor should handle the permitting process.
Can I live in my home during reconstruction?
For minor reconstruction in one or two rooms, most homeowners stay home. For major work involving kitchens, bathrooms, or large areas, temporary relocation may be more practical. If your policy includes additional living expenses (ALE), those costs may be covered.
How long does water damage reconstruction take from start to finish?
Minor reconstruction takes 1 to 3 days. Moderate reconstruction across multiple rooms typically takes 1 to 3 weeks. Major reconstruction involving cabinetry, structural repairs, and custom materials can take 3 to 8 weeks. Material lead times and insurance approval processes are the most common variables that extend timelines.
What should I do if I'm not satisfied with the reconstruction work?
Address concerns during the final walk-through before signing off. Create a written punch list of items that need correction. Reputable contractors expect this and will address items promptly. If issues aren't resolved, contact your adjuster — the carrier has a vested interest in work being completed properly.
Start Your Water Damage Reconstruction the Right Way
Verified drying, clean mold clearance, thorough documentation, and skilled finish work are what separate a restoration you never think about again from one that creates new problems.
MoldRx coordinates professional water damage restoration from emergency response through completed reconstruction — extraction, structural drying, mold prevention, clearance verification, and rebuild — so nothing falls through the cracks between handoffs. For a detailed look at how long the full process takes, we've published realistic timelines based on actual project data.
Call (888) 609-8907 to discuss your water damage reconstruction. Or request a free estimate online — whether you're past the drying phase and ready to rebuild, or just starting the process.
Water Damage Restoration | Emergency Services | Mold Removal | Mold Testing | All Services | Service Areas